A DIY portable solar charger is easy to hold and store. It comes with an AC outlet, and you can utilize it to charge your phone’s battery. Likewise, you can use the charger for charging other gadgets that require power.
To begin, you can think of your requirements for a USB charger. Please note that the number of solar panels used indicates the amount of energy it could store. Fundamentally, solar USB chargers’ specifications also depend on the device that you wish to charge.
Would you like to build your DIY solar USB charger? If yes, you may consider going through the tutorials below.
Table of Contents
What is a Homemade Solar Charger
A solar charger is portable, and you can easily take it with you even when you’re on the go. It allows you to charge your device’s battery wherever you are in a convenient approach.
Indeed, the primary benefit of using a USB device is that it does not call for an external power source to charge your gadget. If you love outdoor activities, you will find it a handy tool to bring with you.
With it, even when you’re away and don’t have access to any power source to charge your phone or other Apple devices, you can stay connected.
How to Make a Solar Powered USB Charger
To get started in building your solar USB charger DIY and enjoy the perks of using solar energy, you will need to prepare the following tools and materials:
Materials:
- 5-volt DC/DC buck converter
- Heat shrink tubing (optional)
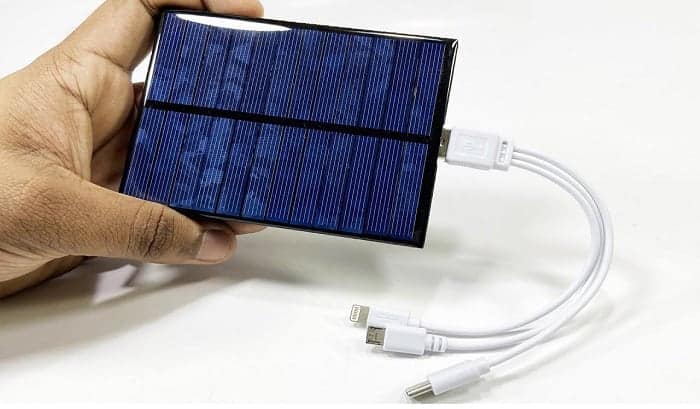
- Two 3-watts 9-volts solar panels
- Reusable grocery bag
- 22 gauge stranded wire
- 4 ¼-inch eyelets (optional)
- E6000 craft glue (hot glue gun)
For the tools:
- Scissors
- Heat gun (optional)
- Wire strippers
- Safety glasses
- ¼-inch eyelet tools (optional)
- Soldering iron
- Hammer (optional)
- Multimeter
The Procedure in Building a DIY Solar Power Phone Charger
Step 1: Prepare the fabric.
Use a reusable grocery bag when cutting a strip of fabric, which you will attach to the solar panels. The reusable grocery bag will serve as protection and enables the panels to fold up for quick storage.
Put the panels, eyelets, and the DC/DC buck converter on the grocery bag in your preferred outline. Ensure that the four eyelets and two 3-watts 9-volts solar panels are laid on the top portion of the grocery bag. Next, using scissors, you may now cut the fabric to your preferred dimensions.
Step 2: Wire your panels in parallel.
For this step, you need to cut a length of wire that you’ll utilize to attach the positive terminals of the solar panels. Then, you may proceed to stripping and soldering the wire from the positive terminal to the positive terminal.
From there, you may now cut a length of wire to attach the negative terminals of your solar panels. Like what you did with the positive terminal, strip and solder the wire from the negative terminal to the negative terminal.
Step 3: Solder the leads to the panels.
The next step would be cutting a length of wire for the positive lead of your solar panels. This would connect one of the solar panel’s positive terminals to the buck converter’s positive terminal. See to it that it could reach where you prefer to position the converter.
Afterward, you may start stripping and soldering the positive lead to one of the solar panel’s positive terminals.
Then, do the same for the negative lead of your solar panels.
Using a multimeter, you can now test the amperage and DC voltage outputs of the panels to ensure that you wired all of them correctly. Attach the positive or red probe of the multimeter to the positive lead. Then, connect the negative probe of the multimeter to the negative lead.
The specs for the solar panels we utilized are as follows:
- 333mA
- 9-volts
- 3-watts
Please note that when you’re wiring the panels in parallel, this adds the current amps together, and at the same time, it keeps the volts the same. Therefore, for voltage, you should see a number at approximately 9-volt DC.
On the other hand, you should see a number roughly 666mA (that is, multiplying 333mA by two).
Step 4: Solder your buck converter to the leads.
Find the negative and positive terminals on your buck converter. Solder the positive lead to the positive terminal of the converter. Meanwhile, solder the negative lead to the negative terminal of the converter. After this step, you should have a solar charger that’s already working.
How to check if the solar charger is working? To check, ensure that your buck converter is attached correctly and working by flashing some light on your solar panels. For this, the LED should light up; so if it illuminates when you check, then that means it is working.
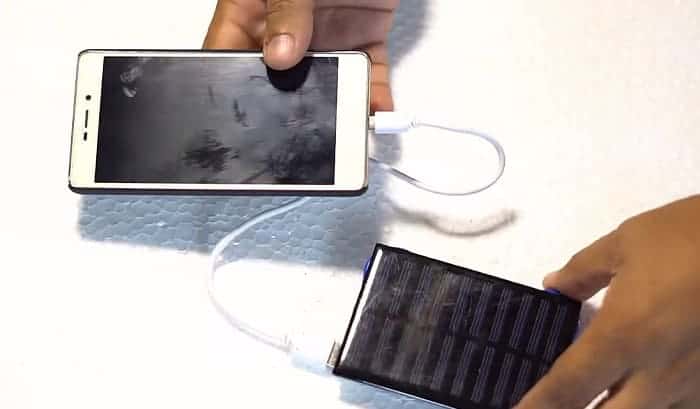
The next thing you’ll need to do is test the charger by putting it outside under sun exposure and plug it into your device. You may now check if your phone or small gadget is charging.
Tip: To safeguard the circuit board, get a heat gun and some heat-shrink tubes to shrink wrap your buck converter.
Step 5: Glue the USB charger to the fabric.
Get your glue and the fabric you cut a while ago. Carefully glue the buck converter and the solar panels to the fabric in your preferred outline. Wait for a few minutes for the glue to set. Before proceeding to the next step, inspect if you have not missed any spots; if there’s any, do some touch-up.
Step 6: Set up the eyelets. (This step is optional.)
Eyelets are good additions because they allow you to strap your charger on your bicycle or backpack. But, if you think this isn’t useful for you, you could skip it.
Set up the two eyelets on the bottom portion, which is the side opposite of your buck converter. From there, you may start cutting a circle in your fabric. To do so, you can use the eyelet as your guide.
Afterward, feed the eyelet bottom via the hole and put the eyelet base tool below the eyelet bottom. Then, position the eyelet top on the above portion of your fabric. Put the eyelet punch tool above the eyelet top and hammer the punch tool to set up the eyelet.
Now for the top eyelets, set them up through both layers of your fabric. Then, be sure to glue the flaps together. You also need to glue your USB port to the fabric. Keep in mind that you should avoid covering the solar panel.
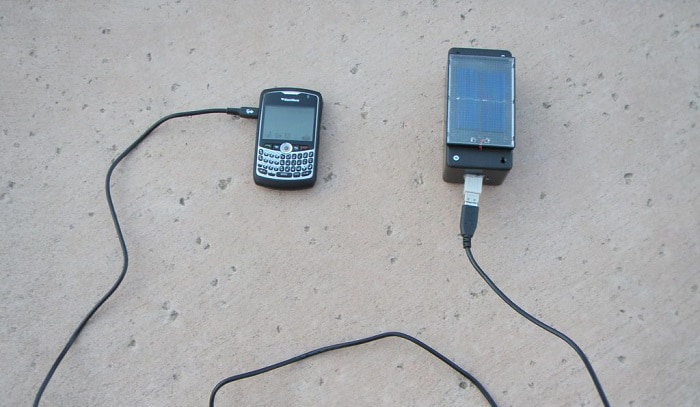
Step 7: Test your solar phone charger DIY.
Since your DIY solar charger is done, it’s time to test it by charging your phone or gadget with it. First, position it outside where there is an ample amount of sun exposure. Then, plug in your device and wait.
If your DIY solar charger is working perfectly, fold it and store it properly once you finish charging your device. Please note that our sample solar charger design does not have an internal battery.
Meanwhile, you can pair your DIY solar charger with any battery pack that you prefer. Some people use two AA batteries and a battery holder. Remember to charge your battery pack during the daytime to utilize it to charge your gadget at night.
Do you want another sample? If you wish to build your DIY solar power bank charger for mobile, you may also get some ideas from this video:
Why is It Essential to Invest in High-Quality Batteries
Opting for a premium quality set of portable external batteries can undoubtedly be of great help in diverse situations. Most outdoor adventure enthusiasts bring at least two in their backpacks all the time, specifically whenever they explore the wild. One is for daily use, while the other one serves as a backup.
Please keep in mind that battery packs act as a supplement, which means to say that they cannot offer a 100% guarantee. In short, you should not expect such devices to bring your gadget’s battery up to a full charge. So, when it comes to utilizing solar panel chargers, the most excellent solution is to utilize them to charge your external batteries.
Not to mention, all rechargeable batteries are designed with a serviceable lifetime, which is commonly gauged in recharge or discharge cycles. While it’s true that not all manufacturers offer this figure, you could expect that a battery pack will have a minimum lifespan of 500 cycles.
Final Thoughts
In summary, a lot of people are interested in building a DIY solar USB charger. One reason is that it’s a valuable tool for those who love outdoor adventures and living off the grid.
A solar USB charger kit can be an expensive investment; however, the good news is that you can make your DIY solar charger. Hopefully, this article we have shared can help you make the most out of the sun’s energy.
Please don’t forget to share this post with your family, friends, and other solar energy enthusiasts! We’d also love to know your tips on charging Apple products & other devices.

As the founder of the Avasolar team, I aspire to solve the problems for households in selecting, installing, and utilizing solar mechanical devices.