Table of Contents
- The Materials Needed for Creating DIY Solar Eclipse Filter for Camera
- The Step-by-Step Process on How to Make a Solar Filter for Camera
- Step 1. Form the circles.
- Step 2. Put tape to the circles formed.
- Step 3. Prepare the filter.
- Step 4. Assemble the solar film.
- Step 5. Get ready to affix the solar film.
- Step 6. Affix the first cardboard ring.
- Step 7. Affix the second cardboard ring.
- Step 8. Form the base.
- Step 9. Attach the base to the filter.
- A Few Helpful Tips
- Conclusion
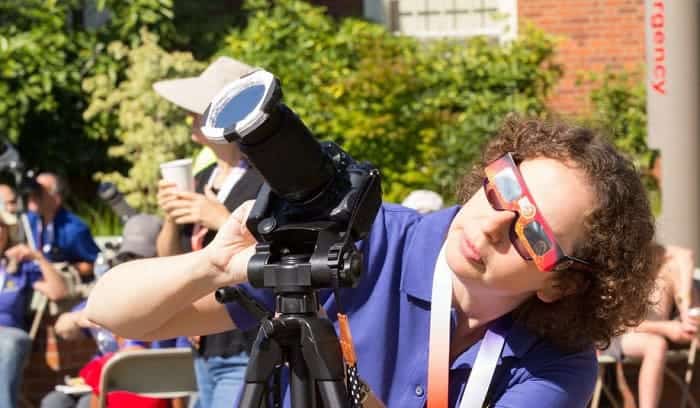
Solar filters perform a vital role in protecting you and your camera against the harmful effects of the sun’s rays. This is the reason why investing in a good quality one is critical, especially if you plan on taking a snapshot of the sun.
However, most solar filters are generally sold for more than a hundred dollars nowadays. Since they are pretty expensive, building your DIY camera solar filter can help you save more.
In this post, we’ll provide you with the required materials and detailed steps on how to make a solar filter for camera. You’ll only have to attach two cardboard rings to a solar film, make a base for your dew shield or camera lens, and glue your solar ring to a cardboard piece.
This way, you can start capturing impressive images of the sun without spending lavishly.
The Materials Needed for Creating DIY Solar Eclipse Filter for Camera
The good news is that some of the materials needed to make your solar filter paper are probably found around your home. This is particularly true if you have kids around.
Perhaps, the only supply you don’t have is the Baader solar film. But don’t worry, you can quickly get this item from online retailers or optics shops.
To build your homemade solar filter for telescope, prepare the following items:
- Mechanical compass
- Pencil
- A few tissues
- A sheet of Baader AstroSolar Safety Film 5.0
- Double-sided tape
- Scissors/razor blade
- Two pieces of heavy cardboard, Bristol board, or white cardstock
- Elmer’s glue (or any craft glue)
The Step-by-Step Process on How to Make a Solar Filter for Camera
When all the items needed for building your solar filter are all set, the next step is to follow the procedure below carefully:
Step 1. Form the circles.
To start, use your pencil and mechanical compass to trace out two circles on your paper. Please note that the circles should be approximately 4 inches larger than the aperture of your camera.
Inside the two circles you created, you need to form another ring that is the same size as your camera’s aperture. Take note that if your camera is designed with an irremovable dew shield, your inner circle should have the same diameter as the dew shield. Then, carefully cut out the circles.
From there, be sure to examine the circles against your camera. Check if the inner circle pairs up with the dew shield or aperture of your camera. Meanwhile, as for the outer ring, it should hang over the edges of your camera.
Step 2. Put tape to the circles formed.
The next step is to put double-sided tape on one side of each circle. To do this with less effort, consider laying out the tape in strips. Afterward, utilize a razor blade or scissors to cut all the excess tape away.
Step 3. Prepare the filter.
Get your tissue paper and spread it out flat on a table. Then, thoroughly tape each corner of the tissue paper to the table and ensure that it lies entirely flat against the table without crumpling.
The tissue paper is meant to shield the solar safety film as you work.
Step 4. Assemble the solar film.
Carefully cut out a square segment of the solar film. Make sure that it is a bit bigger than the outer circle you cut out previously.
For this step, don’t discard any of the protective covers from the film at this time.
Step 5. Get ready to affix the solar film.
Put the square segment of the solar film onto the scrap of tissue you’ve taped to the table. Gently tape your solar film’s corners. This way, it will lay flawlessly flat against the tissue.
After accomplishing that, you may now lightly lift the solar film’s protective covering. You must carry out this task with extra care because any damage to the solar film will affect its optical quality.
Step 6. Affix the first cardboard ring.
Pick up one of the cardboard rings with the adhesive edge facing down and hold it roughly 1-inch on top of the solar film. The main objective here is to ensure that all parts of the ring touch the film concurrently.
When the circle is appropriately placed, you may now drop the circle onto the solar film. From there, you can start applying gentle pressure to affix it appropriately.
Step 7. Affix the second cardboard ring.
For this step, all you need to do is to execute the same method as step 6. Ensure that you carry out the process with extra care and avoid putting any pressure on the solar film.
You may lift the protective film from the above edge of the film. Then, you may affix your cardboard ring. It would be best to have a solar film jammed between the two cardboard rings after this step.
Step 8. Form the base.
You may now start cutting strips approximately 2-inch wide from the same cardstock or cardboard you previously utilized to cut the circles. Cover the first strip around the objective lens or dew cap on your telescope, and be sure to secure it using your double-sided tape.
Do this thing thrice. In doing so, you have a triple-thick ring of cardstock that is effortless to affix to the camera lens or dew shield.
Step 9. Attach the base to the filter.
The last step is to lift the cardstock strips from the telescope. Then, start putting a thin layer of Elmer’s or craft glue to the lowest side of the cardstock strip assembly.
From there, affix it to the solar ring that you have made. When the glue completely dries up, you can use your DIY solar filter for Nikon lens. You should be extra cautious when storing your newly-made solar filter for the camera.
If the solar film becomes bent or scratched, it will be destroyed. So, it’s essential to store the solar filter gingerly and keep it away from anything that may ruin it.
On the other hand, to provide you with a clear and easy-to-follow guide when making a solar filter for your camera, it will be helpful for you to check out this video:
A Few Helpful Tips
- You must carefully check your filter before applying it to your viewing device. If you notice any visible damage, it is best to get rid of it and never use it for solar viewing as it is unsafe.
- In the same way, when operating instruments with solar filters around young kids, make sure that you monitor or supervise their usage.
- Remember to cover your eyes using a filtered instrument when you’re looking at the sun. Keep the eclipse glasses or filtered instrument over your eyes once you’re done looking at the solar event or the sun. Then, divert your fixed stare to a safe angle, and remove the filtered instrument or eclipse glasses.
- It is best to consult expert advice, like an astronomical organization or professional astronomer. This is crucial before you attempt to equip your camera with a solar filter to capture pictures to ensure you’re taking all the required safety measures.
- If you’re outside the path of totality during a solar eclipse, you have to wear the solar-filtered device and eclipse shades to look at the sun directly. Meanwhile, if you’re inside the path of totality, it’s okay to remove the solar filter the moment the moon shadows the sun entirely. But, as soon as the sun’s edge starts to show up again, you should quickly put on your eclipse glasses and solar-filtered instruments. Remember, our eyes allow us to see the wonders of our world, so it’s just right to take proper care of them.
Conclusion
Attempting to look at the sun during a solar event could cause severe damage to our eyes. For this reason, it is significant to use devices or glasses that are appropriately equipped with solar filters as they allow us to gaze at the sun safely.
Hopefully, the detailed guide we have shared can make building your solar filter for your camera a smooth sailing project to accomplish. By preparing the required materials and carefully following the steps mentioned above, you won’t have to spend extravagantly.
In addition, there are many other solar products with reputable brands that we have researched and reviewed. You can also look for 12-volt solar battery chargers or solar battery maintainers. They are quite useful if you are planning your picnic.
Did you like our post about how to make a solar filter for camera? If you find this article informative and interesting, please feel free to share it.

I am Kathleen Miller, staff writer and reviewer of the Avasolar team. Working with the team has been a pleasure for me so far, I hope to bring readers useful information by creating detailed and easy-to-follow contents.